How to Start a Travel Blog

Disclosure: Please note that some of the links below are affiliate links, including the links for HostGator and Bluehost. At no additional cost to you, I earn a commission if you make a purchase using these links. If you have any questions about the companies or my status as an affiliate, please don’t hesitate to email me.
Whether as a hobby or profession, starting a travel blog is pretty easy. You can set it up in under 30 minutes. It’s a lot easier than when I started my blog in 2008. Back then, I didn’t know the first thing about making a website. Luckily, on my adventures around the world, I met Matt and Kat, a British couple who also happened to be web designers.
When I came home and decided I wanted to start this travel blog, they agreed to help me set it up and teach me HTML. I hand-coded the website and used a funky tool called Dreamweaver to build it. It was painfully slow and I wasn’t very good at it. (And my original website was really ugly!)
Luckily, you no longer have to build websites that way!
Creating a website has gotten a lot easier and simpler thanks to WordPress, an out-of-the-box platform designed to make sites easier for those not technically savvy (like myself). It powers over 40% of the internet and is the best platform to start a blog on. It’s super flexible and can do whatever you want it to do — from a simple journal to complex blogs and e-commerce websites.
In our blogging course, we’ve had thousands of students start a website on WordPress without any technical skills. They got them up and running — and you can too!
While I’ve talked about how to succeed as a travel blog in the past, today, I want to give a quick tutorial on how to create a travel blog from scratch in seven easy steps.
Table of Contents
HostGator and Bluehost. I would go with one of those two.
While they are owned by the same parent company, I lean toward HostGator, as I find its call center customer service quicker and friendlier, and HostGator is prone to fewer outages (no one wants their website to go down!).
Here’s a walk-through of how to set up your host with HostGator (it won’t take long):
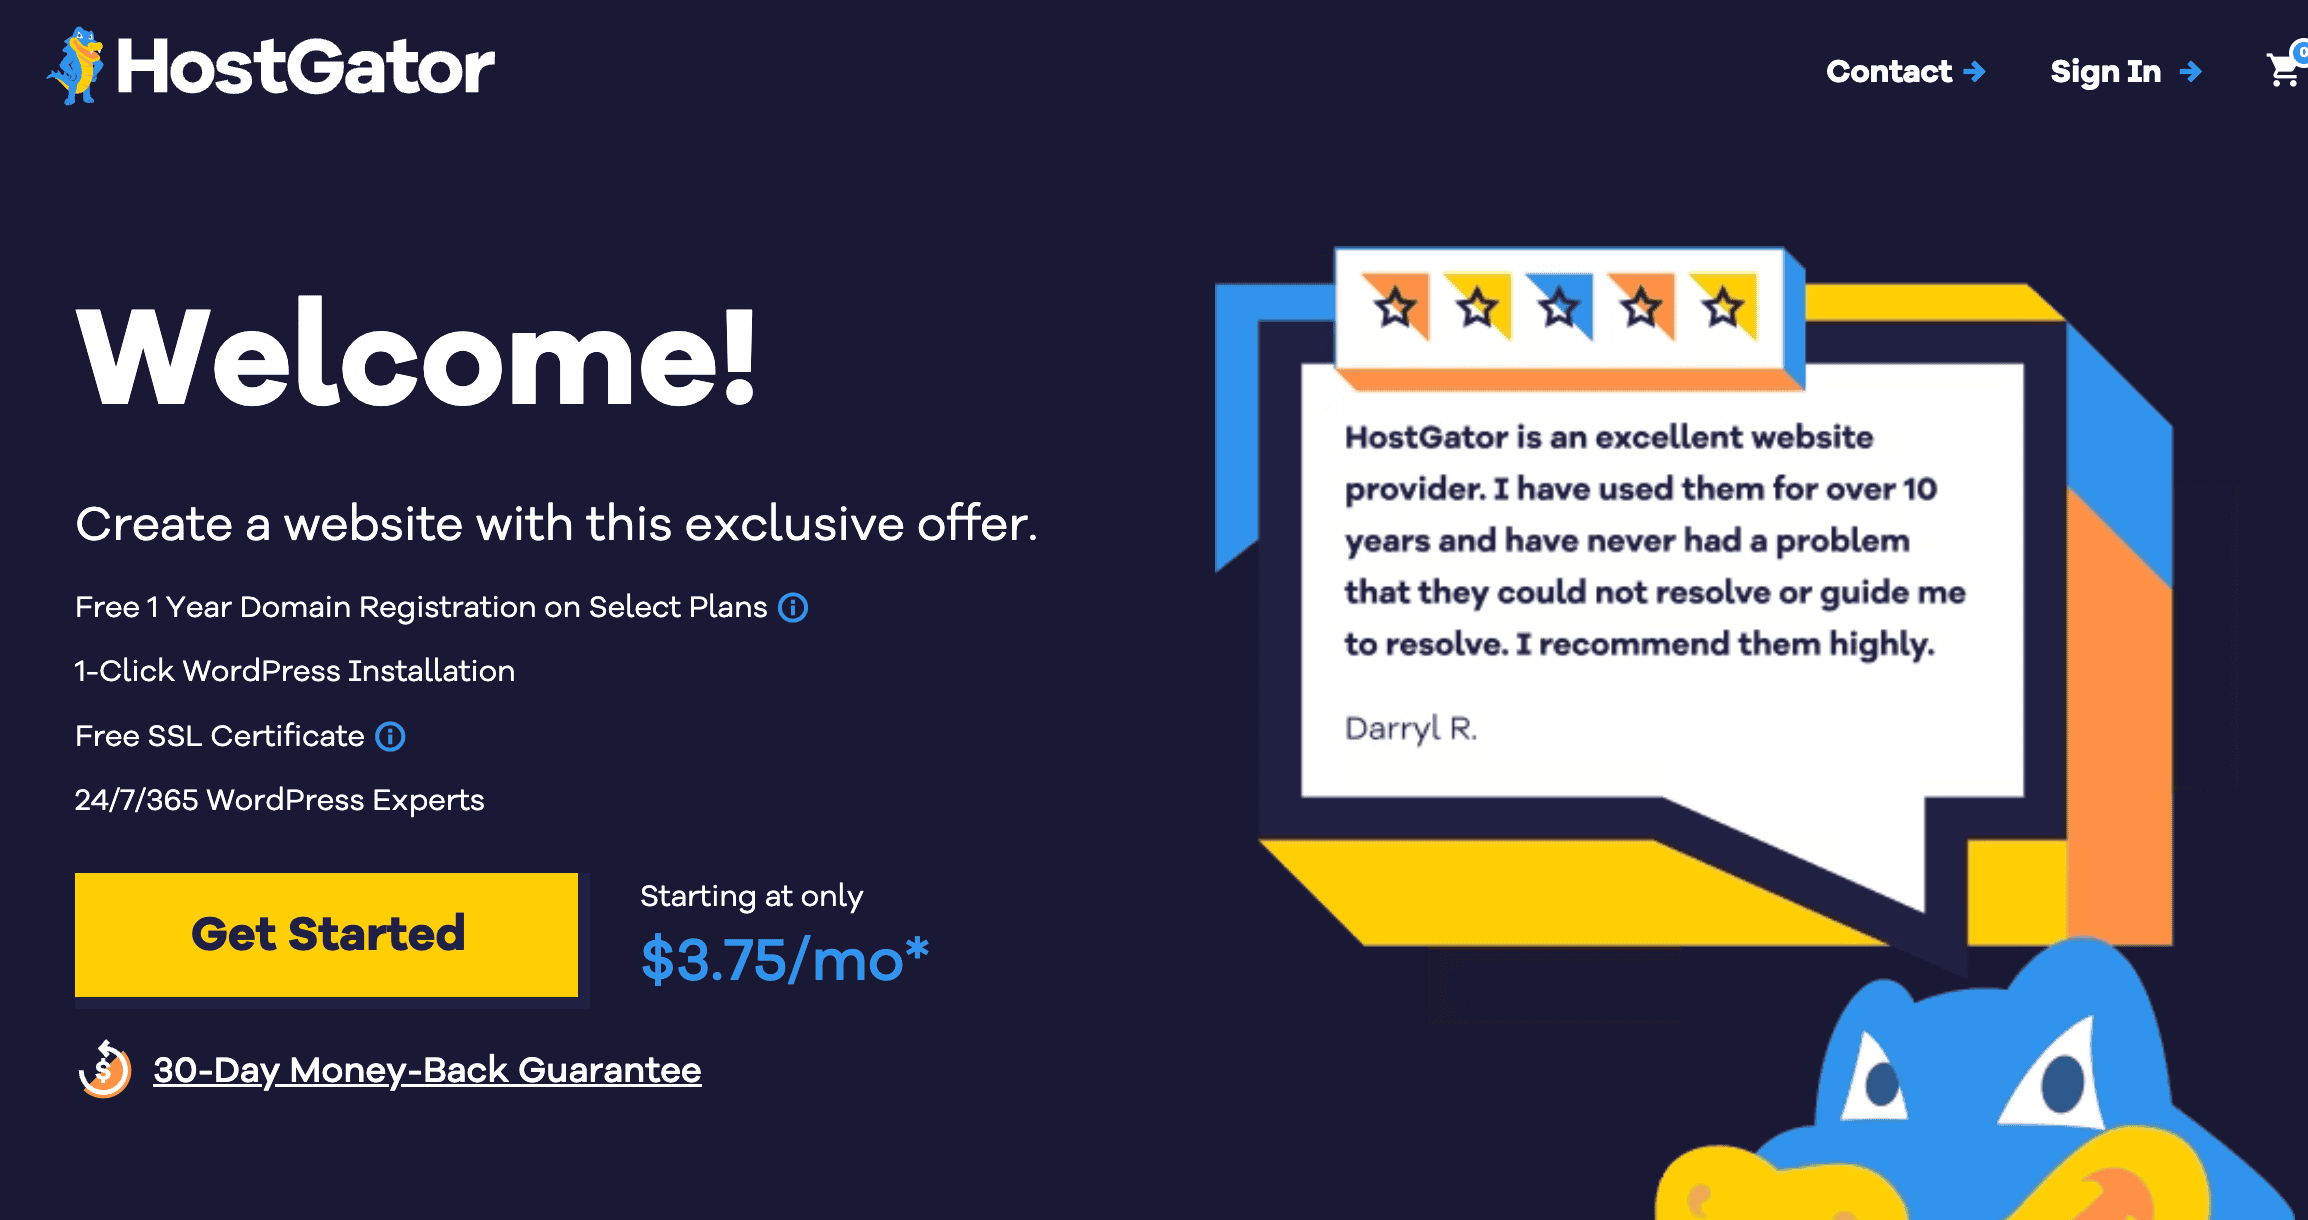
First, head over to the website’s sign-up page and click “Get Started” to start your signup process.
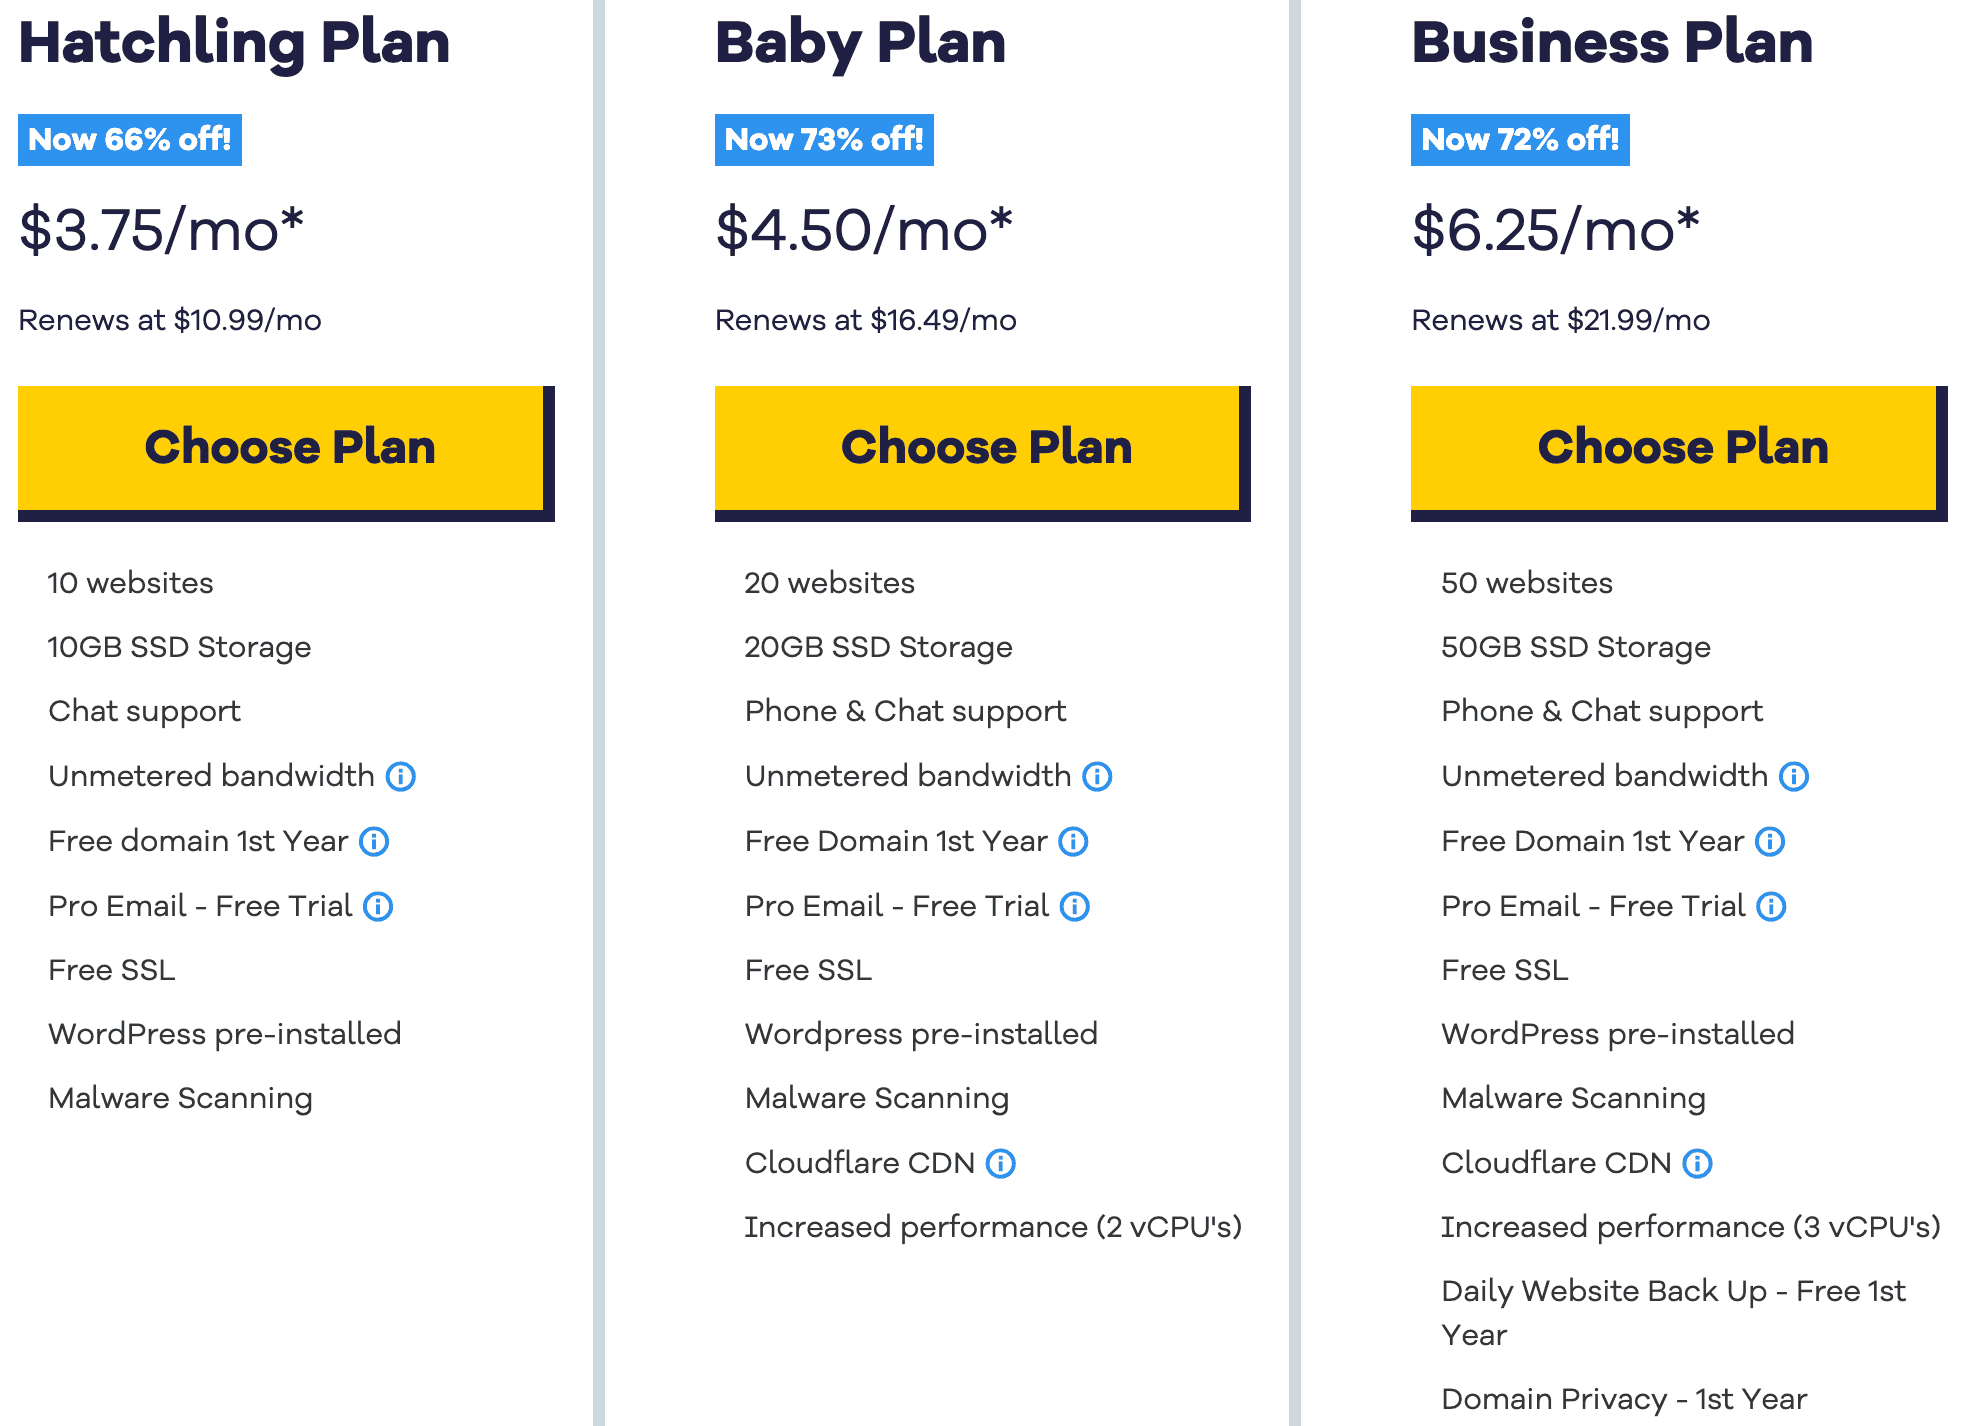
Next, choose your plan (I suggest the hatchling plan):
Enter your desired domain name at the top of the page. Make sure before you sign up that the domain you want is available, so as to avoid issues with your signup process.
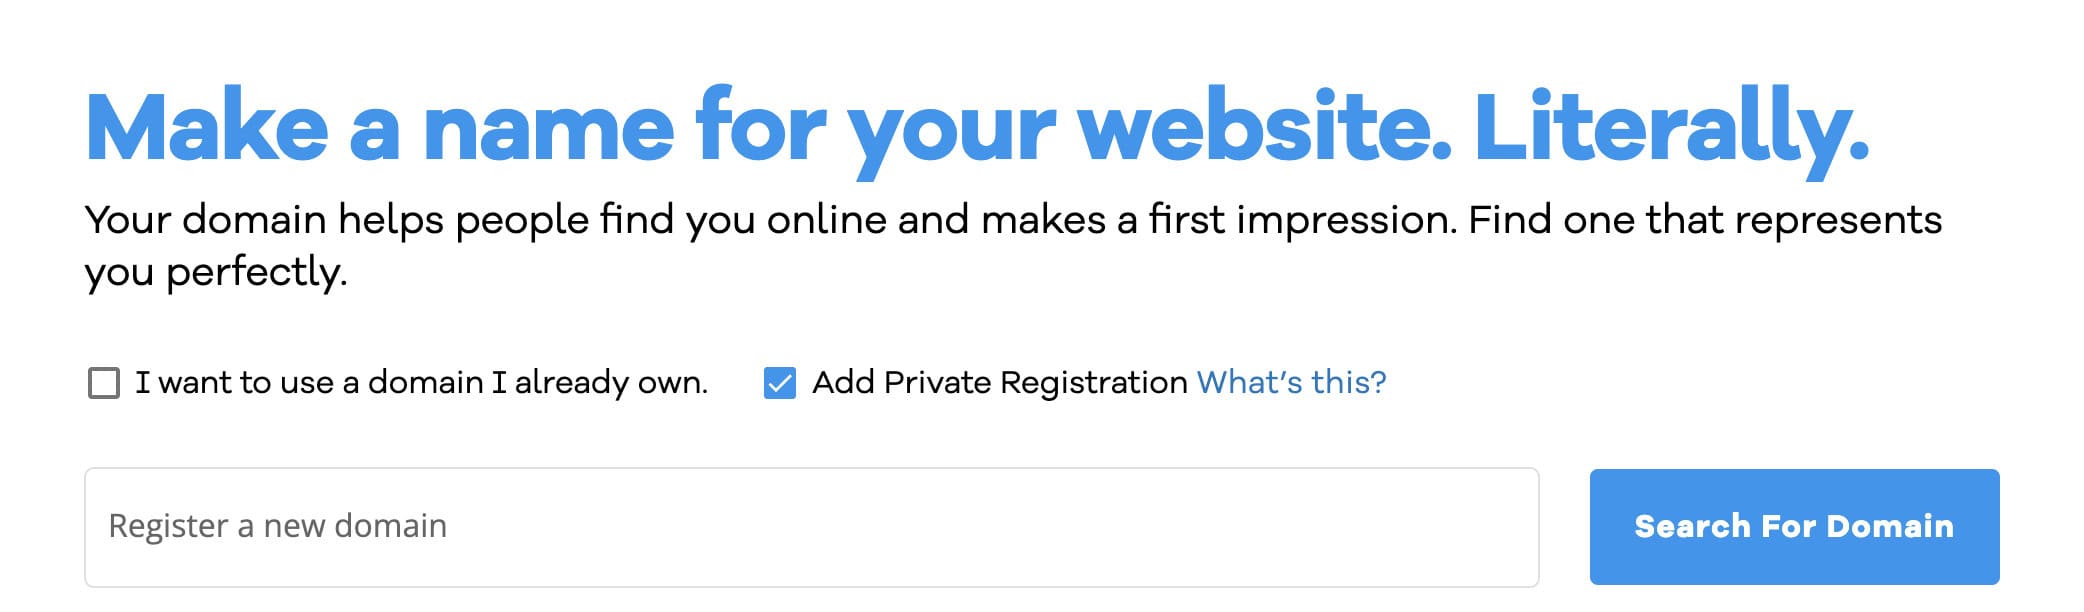
Enter your desired domain name at the top of the page. Make sure before you sign up that the domain you want is available, so as to avoid issues with your signup process.
The system will then prompt you to take out “domain privacy protection,” which we recommend you do. (Why? This will hide your address and contact details from appearing online when someone queries your domain name, and it will keep spammers from calling you to sell their sketchy web services. It’s really annoying — and once your name and phone number are out there, they’re out there forever. Nip it in the bud by hiding them from the beginning.)
If you already have a domain name but need hosting, simply select “I already own this domain” from the tab at the top. Then, enter your domain name and continue to the next step.
Now it’s time to pick your billing cycle. Make sure you have selected the right hosting plan from the drop-down list and then select the billing cycle you are prepared to pay. The longer you lock in for, the cheaper initial pricing will be.
After that, enter your billing information. Fill out your billing information and preferred payment type (credit card or PayPal.)
When that’s done, it’s time to review your order. Review your order details and make sure everything is correct. Then once all is ok complete the checkout/payment process.
Once your order has been received, you’ll be redirected to the HostGator billing portal. You will also be sent an email with a link to log in to your hosting account. Remember you’ll have set your account login details at signup, so enter those if you are prompted to log in to your account.
It will look similar to the example below:

For those of you with an existing domain or a domain purchased from a third-party site like GoDaddy, take note of the nameservers listed on your hosting account email. You will need to add those to your domain where you purchased it, to link your domain and hosting together. Please refer to the support documents from where you bought your domain for exact instructions on how to update your nameservers.
That’s it! All that takes about five minutes from start to finish!
Again, you can click here to go to HostGator to set it up.
wordpress.org.
I suggest getting a premium theme. Yes, it’s another cost — but here is why you should do it:
- With a premium theme, you almost always get customer support from the developers. If you get in trouble, they are there for you. You don’t get that with a free theme.
- With a premium theme, there are more controls and instructions so they are easier to change. Free themes don’t have that.
- Premium themes tend to be a lot prettier.
- Premium themes are faster and more SEO friendly.
To install your theme, simply go to the left-hand column, click Appearance –> Themes –> Upload.
Whatever theme you picked will come as a .ZIP file for you to easily upload. From there, you just activate it, and it’s turned on! All themes come with a manual and help file so you can customize your design to your specific needs.
(If you want a custom logo or need to hire any designers, two sites to find freelancers are Upwork and 99designs.)
click here to learn more and get started!
my course as the tech stuff is the most tedious. But you don’t need to be a computer whiz to get started. You just need to learn the basics.
How much money can you make as a blogger?
There are travel bloggers bringing in over 1 million dollars a year from their website so the sky is the limit! But, realistically, the majority of full-time bloggers make between 50,000–00,000 a year.
That’s it! You’ve set up your basic website. Sure, there are social media buttons to add, blogs to write, images to upload, and things to tweak but all that comes later. Once you do the steps above, you have the framework needed to create and share your story with the world! To recap on how to start a travel blog:
- Step 1: Pick a Name
- Step 2: Sign Up for Hosting
- Step 3: Install WordPress
- Step 4: Set Up Your Website
- Step 5: Install Your Theme
- Step 6: Create Your Main Pages
- Step 7: Join Our Blogging Course (Optional!)
By following these steps, you can start your travel blog and your stories and tips with the world! (That’s where the real fun begins!) Don’t let the tech scare you. I didn’t know anything when I started. I was totally clueless and had to teach myself how to do this. If I can do this, you can start a blog too! I believe in you! (Email me if you want more encouragement.)
Book Your Trip: Logistical Tips and Tricks
Book Your Flight
Find a cheap flight by using Skyscanner. It’s my favorite search engine because it searches websites and airlines around the globe so you always know no stone is being left unturned.
Book Your Accommodation
You can book your hostel with Hostelworld. If you want to stay somewhere other than a hostel, use Booking.com as it consistently returns the cheapest rates for guesthouses and hotels.
Don’t Forget Travel Insurance
Travel insurance will protect you against illness, injury, theft, and cancellations. It’s comprehensive protection in case anything goes wrong. I never go on a trip without it as I’ve had to use it many times in the past. My favorite companies that offer the best service and value are:
- SafetyWing (best for budget travelers)
- World Nomads (best for mid-range travelers)
- InsureMyTrip (for those 70 and over)
- Medjet (for additional evacuation coverage)
Want to Travel for Free?
Travel credit cards allow you to earn points that can be redeemed for free flights and accommodation — all without any extra spending. Check out my guide to picking the right card and my current favorites to get started and see the latest best deals.
Need a Rental Car?
Discover Cars is a budget-friendly international car rental website. No matter where you’re headed, they’ll be able to find the best — and cheapest — rental for your trip!
Need Help Finding Activities for Your Trip?
Get Your Guide is a huge online marketplace where you can find cool walking tours, fun excursions, skip-the-line tickets, private guides, and more.
Ready to Book Your Trip?
Check out my resource page for the best companies to use when you travel. I list all the ones I use when I travel. They are the best in class and you can’t go wrong using them on your trip.
Disclosure: Please note that some of the links above are affiliate links, including the links for HostGator and Bluehost. At no additional cost to you, I earn a commission if you make a purchase using these links. If you have any questions about the companies or my status as an affiliate, please don’t hesitate to email me.